
Connecting a printer to Windows 10 and Windows 11 can sometimes feel overwhelming, especially for beginners. However, with the right steps, it becomes a straightforward process that ensures smooth printing for personal, office, or professional use. Both Windows 10 and Windows 11 provide built-in features that make adding, installing, and troubleshooting printers simple, whether wired or wireless. In this comprehensive guide, we will explain what a printer is, how it works, and step-by-step instructions to connect a printer seamlessly. We will also cover driver installation, network configurations, and solutions to common errors, ensuring you can set up your printer quickly without stress.

What Is A Printer?
A printer is a hardware device that transfers digital documents, images, or data from a computer into physical form on paper. Printers have evolved over the years from bulky machines into compact, high-speed, and efficient devices compatible with multiple operating systems, including Windows 10 and Windows 11. They can be connected via USB cables, Wi-Fi networks, Bluetooth, or cloud-based services. Modern printers often combine additional features such as scanning, copying, and faxing, making them multifunctional devices essential in homes and offices. Understanding what a printer does and how it communicates with your Windows system is the first step toward successful installation and usage.
Types Of Printers Compatible With Windows 10 And Windows 11

Printers available today come in different categories, each offering unique functions for users. The most common include inkjet printers, which are ideal for everyday printing with sharp color quality, and laser printers, designed for high-volume printing with speed and efficiency. Multifunction printers combine printing, scanning, and copying in one device, while photo printers specialize in high-resolution image printing. Both Windows 10 and Windows 11 support these devices, and most printer manufacturers provide specific drivers and software updates compatible with Microsoft systems. Whether using USB, wireless, or Bluetooth connections, understanding printer types helps determine the most efficient setup method.
How To Connect A Printer To Windows 10
Connecting a printer to Windows 10 is simple, as the operating system automatically detects and installs most printers. For a wired connection, plug in the USB cable, turn on the printer, and Windows 10 will install the necessary drivers automatically. For wireless printers, go to “Settings,” select “Devices,” then “Printers & Scanners,” and click “Add a Printer or Scanner.” Once detected, select the printer and follow on-screen instructions. If drivers are not automatically installed, they can be downloaded from the printer manufacturer’s website. Windows 10 also supports printing via Wi-Fi networks and Bluetooth, making setup flexible and convenient.
How To Connect A Printer To Windows 11
Windows 11 introduces a more modern interface for connecting printers, but the steps remain user-friendly. For a wired printer, simply plug in the USB cable, turn on the printer, and let Windows 11 handle driver installation. For wireless printers, click on “Start,” then “Settings,” and choose “Bluetooth & Devices.” Select “Printers & Scanners” and click “Add Device.” Windows 11 will search for nearby printers and allow you to install them seamlessly. If your printer is not detected, you can manually add it using the printer’s IP address. Additionally, downloading official drivers ensures compatibility and prevents common issues.
How To Install Printer Drivers On Windows 10 And Windows 11
Printer drivers act as a communication bridge between your computer and the printer. Without the right drivers, your printer may not function properly. Both Windows 10 and Windows 11 automatically install basic drivers for most printers, but sometimes you need to download and install them manually. Visit the manufacturer’s website, search for your printer model, and download the latest drivers compatible with your operating system. Once downloaded, run the installer and follow the on-screen steps. Installing drivers ensures better performance, access to advanced features, and compatibility with different printing modes such as duplex printing and photo-quality output.
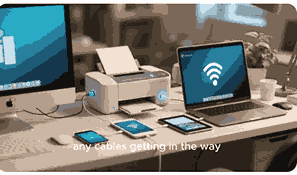
How To Connect A Wireless Printer To Windows 10 And Windows 11
Wireless printers provide flexibility by eliminating cables. To connect a wireless printer to Windows 10, go to “Settings > Devices > Printers & Scanners” and click “Add a Printer or Scanner.” For Windows 11, use “Settings > Bluetooth & Devices > Printers & Scanners” and select “Add Device.” Ensure the printer is connected to the same Wi-Fi network as your computer. Some printers require pressing the WPS button on the router for automatic connection. Once detected, Windows installs the drivers. Wireless printers allow you to print from multiple devices, making them perfect for homes, offices, and classrooms.
How To Connect A Bluetooth Printer To Windows 10 And Windows 11
Bluetooth printers are convenient for quick and cable-free printing. To connect one in Windows 10, go to “Settings > Devices > Bluetooth & Other Devices” and turn on Bluetooth. Select “Add Bluetooth Device” and choose your printer from the list. For Windows 11, go to “Settings > Bluetooth & Devices” and select “Add Device.” Once paired, your printer will appear in the “Printers & Scanners” section. Installing the necessary drivers may be required for proper functionality. Bluetooth printers are best for small-scale printing tasks and provide a hassle-free connection when Wi-Fi networks are unavailable.
Common Problems When Connecting Printers To Windows 10 And Windows 11
Although connecting a printer is usually straightforward, users may face issues such as the printer not being detected, drivers failing to install, or printers going offline. These problems can occur due to outdated drivers, incorrect network settings, or hardware malfunctions. Troubleshooting steps include restarting the printer, ensuring cables or wireless connections are secure, updating Windows, and reinstalling drivers. Sometimes, setting the printer as the default device resolves printing errors. For network printers, verifying that both the printer and computer are connected to the same Wi-Fi network helps fix detection issues.
Troubleshooting Printer Connection Issues In Windows 10 And Windows 11
When printers fail to connect, both Windows 10 and Windows 11 offer built-in troubleshooting tools. In Windows 10, go to “Settings > Update & Security > Troubleshoot” and select “Printer Troubleshooter.” In Windows 11, navigate to “Settings > System > Troubleshoot > Other Troubleshooters” and run the printer troubleshooter. These tools automatically detect and fix common issues such as stalled print queues, connectivity problems, or missing drivers. If problems persist, manually reinstalling the printer or updating firmware may help. Advanced users can check the printer’s IP configuration or use manufacturer support tools for deeper diagnostics.
Conclusion
Connecting a printer to Windows 10 and Windows 11 is easier than ever, thanks to automated detection, improved settings, and compatibility with different connection types. Whether you are using USB, Wi-Fi, or Bluetooth, following the outlined steps ensures a smooth setup process. Keeping drivers updated and using troubleshooting tools can prevent and fix most printing issues. By understanding your printer type, connection method, and system compatibility, you can enjoy reliable printing for personal, academic, or professional needs.
Frequently Asked Questions
1. How Do I Connect A Printer To Windows 10 And Windows 11?
To connect a printer to Windows 10, plug in your USB printer or go to “Settings > Devices > Printers & Scanners” and select “Add a Printer or Scanner.” For wireless printers, ensure the device is connected to your Wi-Fi, then let Windows detect it. On Windows 11, the process is similar but under “Settings > Bluetooth & Devices > Printers & Scanners.” If the printer does not appear automatically, you can add it manually by entering its IP address. Installing official drivers from the manufacturer’s website guarantees full functionality and eliminates connection issues.
2. How Do I Install Printer Drivers On Windows 10 And Windows 11?
Printer drivers allow your computer to communicate with your printer properly. In most cases, Windows 10 and Windows 11 automatically install generic drivers when a printer is connected. However, for advanced features, you may need to download the latest drivers from the printer manufacturer’s official website. After downloading, run the installer and follow the prompts to complete the setup. Installing drivers manually ensures compatibility, prevents errors, and gives you access to advanced functions such as duplex printing, photo printing, and custom settings. Keeping drivers updated is essential for smooth performance and better print quality.
3. How Do I Connect A Wireless Printer To Windows 10 And Windows 11?
To connect a wireless printer, ensure it is connected to the same Wi-Fi network as your Windows computer. On Windows 10, navigate to “Settings > Devices > Printers & Scanners” and click “Add a Printer or Scanner.” On Windows 11, go to “Settings > Bluetooth & Devices > Printers & Scanners” and select “Add Device.” The operating system will search for available printers and allow you to install them. If the printer is not detected, you can add it manually using its IP address. Wireless printers provide flexibility, letting multiple devices print over the same network.
4. How Do I Connect A USB Printer To Windows 10 And Windows 11?
USB printers are among the easiest to set up. Simply plug the USB cable into your computer and turn on the printer. Windows 10 and Windows 11 automatically detect the device and install basic drivers. If your system does not install them automatically, visit the printer manufacturer’s website to download the latest drivers. Once installed, the printer is ready for use. USB connections are ideal for single-device printing setups and ensure a stable, fast connection. They are commonly used in homes, offices, and schools where wireless options are not necessary or practical.
5. How Do I Connect A Bluetooth Printer To Windows 10 And Windows 11?
Bluetooth printers provide wireless printing without needing a Wi-Fi network. To connect one on Windows 10, go to “Settings > Devices > Bluetooth & Other Devices,” turn on Bluetooth, and select “Add Bluetooth Device.” For Windows 11, open “Settings > Bluetooth & Devices” and select “Add Device.” Choose your printer from the list, and Windows will pair it. After pairing, install the necessary drivers to enable full functionality. Bluetooth printing is best for small offices or personal use, offering convenience when cables are not available. However, it is slower compared to Wi-Fi or USB printing.
6. How Do I Manually Add A Printer To Windows 10 And Windows 11?
Sometimes printers are not detected automatically, and manual setup is required. In Windows 10, go to “Settings > Devices > Printers & Scanners” and click “Add a Printer or Scanner.” Choose “The Printer That I Want Isn’t Listed” and select the option to add a printer using its IP address or hostname. In Windows 11, the process is under “Settings > Bluetooth & Devices > Printers & Scanners > Add Device.” Enter the printer details, and Windows will install the necessary drivers. Manual installation ensures your printer connects properly when automatic detection fails.
7. How Do I Set A Default Printer In Windows 10 And Windows 11?
Setting a default printer makes it easier to print without choosing the device each time. In Windows 10, go to “Settings > Devices > Printers & Scanners,” select your preferred printer, and click “Set As Default.” In Windows 11, navigate to “Settings > Bluetooth & Devices > Printers & Scanners,” select the printer, and choose “Set As Default.” Once set, all print jobs will automatically go to this printer unless you choose otherwise. This feature is useful in offices or homes with multiple printers, helping save time and avoiding accidental printing on the wrong device.
8. Why Is My Printer Not Connecting To Windows 10 Or Windows 11?
If your printer is not connecting, the issue could be outdated drivers, incorrect network configurations, or hardware problems. First, restart both the printer and computer. Check that the printer is turned on and properly connected to the USB port or Wi-Fi network. Ensure the drivers are updated by downloading them from the manufacturer’s website. In Windows 10 and 11, you can also use the built-in troubleshooting tool to fix common issues. If the problem persists, manually reinstalling the printer or checking firewall and antivirus settings may help. Hardware malfunctions may require professional repair.
9. How Do I Troubleshoot Printer Problems On Windows 10 And Windows 11?
Both Windows 10 and Windows 11 include built-in troubleshooting tools to fix printer problems. On Windows 10, go to “Settings > Update & Security > Troubleshoot” and run the printer troubleshooter. On Windows 11, navigate to “Settings > System > Troubleshoot > Other Troubleshooters” and select “Printer.” These tools diagnose and fix common problems like stalled print queues, connectivity issues, and driver errors. If troubleshooting does not work, manually reinstalling drivers, resetting network settings, or checking the printer’s IP configuration may resolve the problem. Regular updates of firmware and drivers also prevent most printing errors.
10. How Do I Share A Printer On Windows 10 And Windows 11?
Sharing a printer allows multiple devices on the same network to use it. On Windows 10, go to “Control Panel > Devices And Printers,” right-click your printer, and select “Printer Properties.” Under the “Sharing” tab, enable “Share This Printer.” On Windows 11, open “Settings > Bluetooth & Devices > Printers & Scanners,” select your printer, and choose sharing options. Once shared, other devices on the network can connect and print. Printer sharing is useful in offices, schools, or homes with multiple users. It eliminates the need for multiple printers while maintaining efficiency and cost savings.
11. How Do I Connect A Network Printer To Windows 10 And Windows 11?
Network printers are connected directly to a router, making them accessible to all devices on the network. To connect in Windows 10, go to “Settings > Devices > Printers & Scanners” and click “Add a Printer or Scanner.” In Windows 11, the process is under “Settings > Bluetooth & Devices > Printers & Scanners > Add Device.” If the printer does not appear, manually enter its IP address. Network printers are ideal for offices or shared spaces, allowing multiple users to print efficiently without direct cable connections. Proper driver installation ensures smooth performance.
12. How Do I Remove A Printer From Windows 10 And Windows 11?
Removing a printer can be done when it is no longer needed or replaced by another device. In Windows 10, go to “Settings > Devices > Printers & Scanners,” select the printer, and click “Remove Device.” In Windows 11, navigate to “Settings > Bluetooth & Devices > Printers & Scanners,” select the printer, and choose “Remove.” This process deletes the device and associated drivers from your computer. Removing unused printers prevents clutter and helps avoid confusion when choosing devices. If reinstalling later, Windows will redetect the printer and reinstall the necessary drivers.
13. How Do I Update Printer Drivers On Windows 10 And Windows 11?
Keeping printer drivers updated is essential for compatibility and smooth operation. On Windows 10 and 11, open “Device Manager,” locate your printer under “Printers,” right-click, and select “Update Driver.” Windows will search for the latest drivers automatically. Alternatively, you can visit the manufacturer’s website and download the latest version manually. Updated drivers fix bugs, improve performance, and enable access to advanced features. Outdated drivers may cause printing errors, paper jams, or connectivity issues. Regularly updating ensures your printer works efficiently with both Windows 10 and Windows 11 operating systems without unnecessary disruptions.
14. How Do I Connect A Canon Printer To Windows 10 And Windows 11?
Canon printers are widely used for personal and office printing needs. To connect a Canon printer on Windows 10, plug in the USB cable or use “Settings > Devices > Printers & Scanners” to add a wireless device. On Windows 11, the process is through “Settings > Bluetooth & Devices > Printers & Scanners > Add Device.” If the printer is not detected automatically, download Canon drivers from the official website. Canon printers also support mobile printing via Wi-Fi Direct and cloud services. Installing official Canon software enhances compatibility and ensures better printing performance across devices.
15. How Do I Connect An HP Printer To Windows 10 And Windows 11?
HP printers offer a variety of connection options. To connect on Windows 10, use “Settings > Devices > Printers & Scanners” and select your HP printer. On Windows 11, go to “Settings > Bluetooth & Devices > Printers & Scanners > Add Device.” For more control, install the HP Smart App, which helps with setup, driver installation, and troubleshooting. If the printer is not detected, download drivers from HP’s official support website. HP printers are reliable, supporting USB, Wi-Fi, and Bluetooth connections. Proper setup ensures high-quality printing, easy scanning, and additional features for home and office use.
16. How Do I Connect An Epson Printer To Windows 10 And Windows 11?
Epson printers are known for their durability and high-quality printing. To connect an Epson printer on Windows 10, plug it in via USB or add it wirelessly using “Settings > Devices > Printers & Scanners.” On Windows 11, navigate to “Settings > Bluetooth & Devices > Printers & Scanners > Add Device.” Epson also provides the “Epson Connect” software, which helps configure wireless and remote printing. If your printer is not detected, download the latest drivers from the Epson website. Installing Epson utilities ensures full compatibility, advanced settings, and smooth printing performance on both operating systems.
17. How Do I Connect A Brother Printer To Windows 10 And Windows 11?
Brother printers are popular for both home and business use. To connect on Windows 10, go to “Settings > Devices > Printers & Scanners” and click “Add a Printer or Scanner.” In Windows 11, the process is under “Settings > Bluetooth & Devices > Printers & Scanners > Add Device.” If the printer does not appear, manually enter its IP address or install the official Brother drivers from the support website. Brother printers also support Wi-Fi Direct and network sharing. Installing Brother’s utilities ensures better control over features like duplex printing, high-speed scanning, and troubleshooting.
18. How Do I Connect A Dell Printer To Windows 10 And Windows 11?
Dell printers are designed to work efficiently with Microsoft systems. To connect on Windows 10, plug in via USB or use “Settings > Devices > Printers & Scanners” to add a wireless printer. On Windows 11, navigate to “Settings > Bluetooth & Devices > Printers & Scanners > Add Device.” If the printer is not detected, download and install the latest Dell drivers from the support page. Dell printers often include software for advanced configuration, making it easier to manage print settings and troubleshoot problems. Proper installation ensures smooth performance and long-term reliability.
19. How Do I Connect A Samsung Printer To Windows 10 And Windows 11?
Although Samsung no longer produces new printers, many users still own existing models. To connect a Samsung printer on Windows 10 or Windows 11, plug it in via USB or search for it under “Printers & Scanners.” If the printer is not detected, download drivers from the HP support website, as HP now provides updates for Samsung printers. Once installed, the printer should function normally. Samsung printers are reliable and still widely used in homes and offices. Using the latest drivers ensures compatibility with Windows 10 and Windows 11 systems, allowing continued performance without issues.
20. How Do I Connect A Wireless Network Printer To Windows 10 And Windows 11?
Wireless network printers connect directly to routers, allowing multiple devices to print without cables. To add one on Windows 10, go to “Settings > Devices > Printers & Scanners” and click “Add a Printer or Scanner.” On Windows 11, use “Settings > Bluetooth & Devices > Printers & Scanners > Add Device.” If not detected, manually enter the printer’s IP address. Ensure the printer is connected to the same Wi-Fi network as your computer. Installing the manufacturer’s drivers enhances compatibility. Network printers are ideal for offices, schools, and shared environments where multiple users need access.
FURTHER READING
- How To Connect A Printer To Windows | Easy Setup And Troubleshooting Guide For Windows Printers
- How To Connect A Printer To A Mac | Easy Setup, Wireless Printing, And Troubleshooting Guide For macOS
- How To Add A Printer To Your Computer | Easy Step-By-Step Guide To Connect Printers To Computers
- What Is The Best Printer For My Needs? | A Complete Guide To Choosing The Right Printer For Your Needs
- How To Connect A Printer To A Tablet | Easy Guide To Printing From Tablets For Better Productivity
- Why Your Printer Print Slowly | Common Causes, Fixes, And Speed Optimization Tips
- How To Print From Your Phone To A Printer | Easy Wireless And Mobile Printing Guide
- What Is The Difference Between An Inkjet Printer And A Laser Printer? | Inkjet Vs Laser Printer Comparison, Pros And Cons, Buying Guide
- How To Update Your Printer Firmware | A Step-By-Step Guide For Better Printing Performance
- How To Share A Printer On A Network | Easy Printer Sharing Setup For Windows, Mac, And Wireless Networks