


Adding a printer to your computer is one of the most important steps for anyone who needs to print documents, images, or other materials either at home, in school, or at the office. Knowing how to add a printer to your computer correctly ensures that you avoid errors, wasted time, and unnecessary frustrations when trying to print. Whether you are connecting a wireless printer, a USB printer, or a network printer, the process is straightforward if you follow the right steps. This guide will explain what a printer is, how it works, and provide you with practical ways to add a printer to your computer successfully.
What Is A Printer?
A printer is an electronic device designed to produce hard copies of digital documents, images, and files stored on your computer, smartphone, or other devices. Printers come in different types, including inkjet printers, laser printers, multifunction printers (which also scan and copy), and wireless printers that connect through Wi-Fi or Bluetooth. Printers are essential in offices, schools, and even homes because they allow users to convert digital information into physical form. Understanding the type of printer you are using helps determine the method of connecting it to your computer, whether through USB cable, network setup, or wireless technology. The setup process is key to ensuring smooth printing operations.
Types Of Printers You Can Connect To Your Computer
There are various types of printers you can add to your computer, and each has its own method of installation. Inkjet printers are commonly used for high-quality printing at home, while laser printers are favored for fast printing in offices. Wireless printers allow easy connection through Wi-Fi without cables. Network printers are used in businesses where multiple computers need access. USB printers are the simplest type, requiring just a cable connection to your computer. Understanding the type of printer you are dealing with helps you know the exact steps for connecting it properly.
How To Add A USB Printer To Your Computer
Adding a USB printer is often the easiest method. Simply connect the USB cable from the printer to your computer. Most modern computers will automatically detect the printer and install the necessary drivers. If the drivers do not install automatically, you can insert the CD that came with the printer or download the driver software from the manufacturer’s website. Once installed, the printer should appear in your computer’s list of available devices. You can then set it as the default printer if desired.
How To Add A Wireless Printer To Your Computer
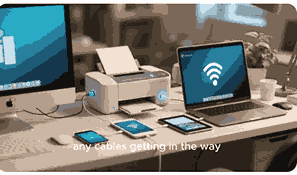
Adding a wireless printer requires connecting your printer to the same Wi-Fi network as your computer. Start by turning on the printer and accessing its wireless setup menu. Select your Wi-Fi network and enter the password. Once the printer is connected, go to your computer’s settings, navigate to the devices section, and click “Add Printer.” Your computer will search for available printers on the network. Select your printer from the list and install the necessary drivers. After this, you can print wirelessly from your computer.
How To Add A Network Printer To Your Computer
Network printers are usually used in businesses where many computers need to connect to a single printer. To add a network printer, ensure your computer is connected to the same local network. Go to your computer’s device settings and choose “Add Printer.” Select the option to add a network printer. You may be asked to enter the printer’s IP address, which can usually be found in the printer’s settings menu or network configuration page. Once entered, your computer will install the drivers, and the network printer will be ready for use.
Common Problems When Adding A Printer To A Computer
Sometimes, adding a printer to your computer can fail due to common issues. These problems include outdated drivers, Wi-Fi connection errors, wrong printer settings, or even incompatible software. USB cables can also be faulty, and wireless printers may not connect if the Wi-Fi signal is weak. To fix these problems, update your computer’s operating system, reinstall the correct drivers, check cables, and ensure the printer is on the same network. Troubleshooting these errors can help you complete the installation successfully.
Benefits Of Adding A Printer To Your Computer
Having a printer properly connected to your computer offers many advantages. It makes printing documents quick and easy, saves time compared to using external print shops, and allows for better productivity in schools and offices. Wireless printers add the benefit of printing from anywhere in the building without cables. A correctly added printer also enables you to scan, copy, and fax (if multifunction) directly from your computer. This convenience improves workflow and efficiency.
Conclusion
Adding a printer to your computer is essential for anyone who needs to print documents regularly. Whether it is a USB printer, wireless printer, or network printer, the setup process can be done in just a few steps. Understanding the type of printer, installing the right drivers, and troubleshooting common issues ensures a smooth connection. Once your printer is added successfully, you can enjoy the convenience of fast and reliable printing.
Frequently Asked Questions
1. How Do I Add A Printer To My Computer?
Adding a printer to your computer depends on the type of printer you are using. For a USB printer, connect it directly with a USB cable and install the drivers automatically or manually. For a wireless printer, connect it to the same Wi-Fi network as your computer, then go to your settings and select “Add Printer.” Network printers require entering the IP address during installation. In all cases, ensure you install the correct drivers either automatically or from the manufacturer’s website. Once set up, the printer will appear in your device list, and you can use it to print documents easily.
2. How Do I Add A Wireless Printer To My Computer?
To add a wireless printer, first ensure it is connected to your Wi-Fi network. Use the printer’s wireless setup menu to enter your Wi-Fi details. On your computer, go to device settings and select “Add Printer.” Your computer will search the network and display available printers. Choose your printer and allow the drivers to install automatically. If the printer does not appear, you may need to enter its IP address manually. Once installed, test it by printing a sample document. Wireless printers are convenient as they allow you to print from anywhere within your Wi-Fi range.
3. How Do I Add A USB Printer To My Computer?
To add a USB printer, plug the USB cable into your computer and the printer. Most modern systems automatically detect the printer and install the drivers needed. If this does not happen, use the CD provided or download the drivers from the printer manufacturer’s official website. Once the drivers are installed, the printer should show up under your devices. You can set it as your default printer for convenience. Always make sure the printer is turned on and the USB cable is properly connected when installing. After setup, try printing a test page to confirm successful installation.
4. How Do I Add A Network Printer To My Computer?
Adding a network printer involves connecting your computer to the same local network as the printer. On your computer, go to device settings and choose “Add Printer.” Select the option for network printers, and you may be asked to enter the printer’s IP address. This address is usually available in the printer’s settings or network configuration page. After entering the IP address, your computer will detect the printer and install the drivers. Once completed, the network printer will appear in your list of devices, allowing you to print from any computer on the same network.
5. Why Is My Computer Not Detecting My Printer?
Your computer may not detect your printer for several reasons. If using a USB printer, the cable might be faulty or not properly connected. Wireless printers may not appear if they are not connected to the same Wi-Fi network as your computer. Another common issue is outdated or missing drivers. To fix this, reinstall or update your printer drivers from the manufacturer’s website. Also, check that the printer is turned on, has no error messages, and is connected properly. Restarting both the computer and printer can also resolve detection issues.
6. How Do I Manually Add A Printer To My Computer?
If automatic detection fails, you can manually add a printer. Go to your computer’s device settings and click on “Add Printer.” Choose the manual option, which usually allows you to add the printer using its IP address, hostname, or a specific port. For USB printers, you may select the driver manually from a list or install it using the downloaded driver software. After entering the details, your computer will connect to the printer and set it up. This method is useful when dealing with older printers or when network auto-detection does not work.
7. How Do I Add A Bluetooth Printer To My Computer?
Adding a Bluetooth printer requires enabling Bluetooth on both your computer and the printer. Go to your computer’s Bluetooth settings and search for nearby devices. Select your printer when it appears and follow the pairing instructions. You may be asked to enter a pairing code provided by the printer. Once paired, go to the device settings and click “Add Printer.” Your computer should now recognize the Bluetooth printer, and the drivers will install automatically. After installation, you can print wirelessly through Bluetooth, which is especially useful when Wi-Fi is unavailable.
8. How Do I Add A Printer To My Computer Without A CD?
Most modern printers no longer require a CD for installation. Instead, connect the printer via USB or Wi-Fi, and your computer will automatically detect it. If the drivers are not installed automatically, visit the manufacturer’s website and download the correct drivers for your printer model. Once downloaded, install the software and follow the on-screen prompts. After installation, the printer will appear in your device list. This method is simple, reliable, and ensures you always get the latest driver version rather than relying on outdated CD software.
9. How Do I Add A Shared Printer To My Computer?
Adding a shared printer allows multiple users to access one device. First, ensure the printer is shared from the host computer. On your computer, go to “Add Printer” in device settings. Select the option to add a shared printer, and browse the network to find the one shared by another computer. Select the printer and install the drivers when prompted. Once complete, the shared printer will appear in your list of devices. This method is common in offices where several computers need access to one centralized printer.
10. How Do I Add A Printer To My Computer On Windows 10?
On Windows 10, adding a printer is simple. Go to “Settings,” then select “Devices” and click on “Printers & Scanners.” Choose “Add a printer or scanner,” and Windows will search for available devices. Select your printer from the list and follow the installation prompts. If your printer does not appear, click “The printer that I want isn’t listed” and add it manually using its IP address or by installing the driver software. Once installed, your printer will be ready to use. This method works for USB, wireless, and network printers.
11. How Do I Add A Printer To My Computer On Windows 11?
In Windows 11, go to “Settings,” then “Bluetooth & Devices,” and click on “Printers & Scanners.” Choose “Add Device,” and Windows will search for nearby printers. Select your printer and let the drivers install automatically. If your printer does not appear, use the manual option to add it by IP address or by installing drivers manually. Windows 11 also allows automatic detection for most modern printers, making the process quick. Once installed, test the printer by printing a sample page to confirm everything is working properly.
12. How Do I Add A Printer To My Computer On Mac?
On a Mac, open “System Preferences” and go to “Printers & Scanners.” Click the plus (+) button to add a new printer. Select your printer from the available list. If it is not listed, you can add it manually using the printer’s IP address. For wireless printers, ensure your Mac is connected to the same Wi-Fi network as the printer. Once added, macOS usually downloads the drivers automatically. After installation, you can set it as your default printer and print documents easily from any application.
13. How Do I Add A Printer To My Computer Using An IP Address?
Adding a printer using its IP address is useful when automatic detection fails. Go to device settings and click “Add Printer.” Select the manual option to add a printer by IP address. Enter the correct IP address, which can be found in the printer’s network settings or configuration page. Once entered, your computer will attempt to connect to the printer and install the drivers. If successful, the printer will appear in your devices, ready for use. This method is commonly used for network printers in offices.
14. How Do I Add A Printer To My Computer With Drivers?
When adding a printer with drivers, first download the correct driver software from the manufacturer’s website. Once downloaded, run the installer and follow the prompts. Connect your printer using USB, Wi-Fi, or network, depending on your type. The driver ensures that your computer can communicate properly with the printer. Without drivers, most printers will not function correctly. After installation, check your devices list to confirm the printer is added. Printing a test page helps confirm that everything is set up correctly.
15. How Do I Add A Printer To My Computer At Work?
In workplaces, printers are often shared or networked. To add a work printer, connect your computer to the company’s network. Go to “Add Printer” in device settings and search for available printers. If you know the IP address, enter it manually. Some companies use shared printers hosted on specific computers or servers. You may need administrator permission to install drivers. Once the printer is added, test it by printing a document. Proper setup at work improves efficiency and allows multiple employees to use the same printer.
16. How Do I Add A Printer To My Computer At Home?
At home, adding a printer is usually straightforward. For USB printers, plug in the cable and let the drivers install. For wireless printers, connect the printer to your Wi-Fi network, then add it through your computer’s device settings. If your computer does not detect it automatically, install the drivers manually from the manufacturer’s website. After installation, set the printer as your default device. Home printers are useful for schoolwork, documents, and personal projects, and adding one correctly ensures smooth printing without technical issues.
17. How Do I Add A Printer To My Computer Wirelessly?
To add a printer wirelessly, ensure your printer and computer are connected to the same Wi-Fi network. Use the printer’s wireless setup wizard to connect it to Wi-Fi. Then, on your computer, go to device settings and choose “Add Printer.” Select your printer from the available list and follow the installation prompts. If your printer does not appear, use its IP address to add it manually. Once connected, print a test document to verify. Wireless printing provides flexibility and eliminates the need for cables, making it ideal for home and office use.
18. How Do I Add A Printer To My Computer If It Is Not Found?
If your computer cannot find your printer, start by checking the connection. For USB printers, ensure the cable is secure. For wireless printers, confirm that both devices are on the same Wi-Fi network. If still not found, restart the printer and the computer. You may also need to manually add the printer using its IP address or hostname. Updating or reinstalling the drivers from the manufacturer’s website can also fix detection issues. Once installed, your printer should appear and be ready for printing.
19. How Do I Add A Printer To My Computer Using Wi-Fi?
To add a printer using Wi-Fi, connect the printer to your wireless network through its setup menu. After successful connection, go to your computer’s device settings and select “Add Printer.” Your computer will scan for available printers on the same Wi-Fi network. Select your printer and follow the on-screen prompts to install drivers. If your computer does not detect it, enter the printer’s IP address manually. Once installed, test the connection by printing a sample page. Wi-Fi printing makes the process faster and more convenient without relying on cables.
20. How Do I Add A Printer To My Computer Automatically?
Many modern printers support automatic installation. For USB printers, simply plug the printer into your computer, and the drivers will install automatically. For wireless printers, connect the printer to your Wi-Fi network, then open device settings and click “Add Printer.” In most cases, your computer will detect it and install the drivers without manual input. Automatic setup saves time and reduces errors. If the automatic process fails, you can always fall back on downloading and installing the drivers manually from the manufacturer’s official website.
Further Reading
- What Is The Best Printer For My Needs? | A Complete Guide To Choosing The Right Printer For Your Needs
- How To Connect A Printer To A Tablet | Easy Guide To Printing From Tablets For Better Productivity
- Why Your Printer Print Slowly | Common Causes, Fixes, And Speed Optimization Tips
- How To Print From Your Phone To A Printer | Easy Wireless And Mobile Printing Guide
- What Is The Difference Between An Inkjet Printer And A Laser Printer? | Inkjet Vs Laser Printer Comparison, Pros And Cons, Buying Guide
- How To Update Your Printer Firmware | A Step-By-Step Guide For Better Printing Performance
- How To Share A Printer On A Network | Easy Printer Sharing Setup For Windows, Mac, And Wireless Networks
- How To Reset Your Printer | Easy Printer Reset Guide For All Models
- How Long Does A Printer Last? | Printer Lifespan, Maintenance, And Durability Guide
- What Is A 3D Printer? | Definition, Types, Uses, Benefits, Of 3D Printing Technology Explained