
Printing a test page from a printer is one of the most effective ways to check if your printer is working properly, aligned correctly, and producing high-quality prints. Whether you are using an inkjet printer, laser printer, or an all-in-one multifunction device, running a test page helps you identify problems with drivers, ink cartridges, toner, or print alignment. This guide explains how printers work, why test pages are important, and step-by-step instructions for printing test pages across different operating systems and devices. By the end of this article, you will have a complete understanding of how to maintain your printer for optimal performance.

What Is A Printer?
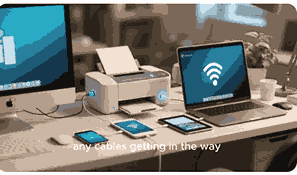
A printer is a peripheral device that connects to a computer, smartphone, or network and transforms digital documents or images into physical copies on paper. Printers come in many types, including inkjet, laser, thermal, and multifunction devices. Inkjet printers spray liquid ink through nozzles, while laser printers use toner and heat to fuse powder onto paper. Printers can connect via USB, Wi-Fi, Bluetooth, or Ethernet, depending on the model. Modern printers also support cloud printing and wireless mobile printing. Test pages are essential for diagnosing hardware and software issues, ensuring color calibration, checking ink levels, and troubleshooting connectivity problems. Understanding how printers operate helps you effectively use features like test page printing and maintenance functions.
Importance Of Printing A Test Page

Printing a test page ensures that your printer is functioning correctly and producing accurate results. It helps you detect issues with ink cartridges, toner, color balance, and print head alignment. For new printer installations, a test page confirms that drivers are installed properly. For older printers, running a test page reveals whether ink or toner levels are low or if there are clogs or streaks in the print head. This process is also useful when troubleshooting connectivity issues between a computer and printer. Regularly printing test pages helps maintain the longevity of your device and prevents poor-quality prints, saving you time and resources in the long run.
How To Print A Test Page On Windows
On Windows computers, printing a test page is straightforward. Begin by opening the Control Panel, then navigate to “Devices and Printers.” Right-click on your printer icon and select “Printer Properties.” In the properties window, click on “Print Test Page.” The printer will immediately print a page showing alignment, colors, and text quality. Alternatively, on Windows 10 and Windows 11, you can access “Settings,” go to “Devices,” then “Printers & Scanners.” Select your printer and click “Manage,” followed by “Print a Test Page.” This feature is useful for quickly diagnosing any hardware or driver-related issues without needing to open documents.
How To Print A Test Page On Mac
Mac users can easily print a test page using System Preferences. Start by clicking the Apple Menu, then select “System Preferences,” followed by “Printers & Scanners.” Choose your printer from the list and click on “Options & Supplies.” Under the “Utility” tab, you will find the option to open the Printer Utility. Within the utility, there is a button for “Print Test Page” or “Print Diagnostic Page,” depending on the printer model. Running this test page provides information about ink distribution, color patterns, and any alignment errors. This process helps ensure your Mac is communicating correctly with the printer and that the output is sharp and clear.
How To Print A Test Page On Linux
Linux users can print a test page through the Common UNIX Printing System (CUPS) interface. Open your web browser and type “http://localhost:631” into the address bar. This opens the CUPS administration page. From there, click on “Printers,” select your installed printer, and choose the “Maintenance” option. You will find “Print Test Page” in the dropdown menu. Alternatively, most Linux desktop environments also include a printer settings panel within “System Settings” or “Preferences,” where you can select your printer and print a test page. This method confirms that your Linux system has properly recognized the printer drivers and ensures print quality is acceptable.
How To Print A Test Page Directly From A Printer
Many printers allow you to print a test page directly without using a computer. On most inkjet and laser printers, this is done by pressing and holding certain button combinations such as “Power” and “Resume,” or by navigating the printer’s onboard control panel. For example, some HP printers let you press and hold the “Cancel” and “Color Copy” buttons simultaneously to print a diagnostic page. Others have touchscreen menus where you can select “Setup,” “Tools,” or “Reports,” and then choose “Print Test Page.” This method is helpful if you want to troubleshoot printer issues independently of your computer or mobile device.
Troubleshooting Printer Test Page Issues
Sometimes a printer may fail to print a test page, and this could indicate several problems. Common causes include outdated or corrupted printer drivers, low ink or toner levels, clogged print heads, or hardware malfunctions. If your printer does not respond, check its power and connection cables, ensure it is set as the default printer, and reinstall the drivers if necessary. For inkjet printers, run the built-in cleaning cycle to clear blocked nozzles. For laser printers, check the toner cartridge and fuser. Troubleshooting test page problems early helps restore printing performance and prevents further technical issues.
Benefits Of Printing A Test Page Regularly
Running a test page at regular intervals provides multiple benefits. It ensures that ink or toner is flowing properly, prevents clogs, and confirms that the printer is correctly aligned. This process also saves money by detecting problems before they become serious and require costly repairs. Regular test page printing improves print quality, helps maintain color consistency, and guarantees that your printer is always ready for high-volume jobs. Additionally, test pages provide a diagnostic tool for identifying software, driver, or hardware issues, making them an essential part of printer maintenance and long-term care.
Conclusion
Printing a test page is a crucial part of printer maintenance, troubleshooting, and ensuring quality prints. Whether you use Windows, Mac, Linux, or print directly from the printer, knowing how to run a test page helps you detect problems early and maintain efficiency. By regularly checking alignment, ink flow, and connectivity, you can extend the life of your printer and ensure professional-quality prints every time.
Frequently Asked Questions
1. How Do I Print A Test Page From A Printer?
To print a test page from a printer, the method depends on your operating system and printer model. On Windows, go to “Devices and Printers,” select your printer, and click “Print Test Page.” On Mac, open “Printers & Scanners,” choose your device, and select “Print Test Page” under the utility menu. Linux users can use the CUPS interface or system settings to access the test page option. Many printers also allow test pages directly from onboard menus or by pressing button combinations. This page helps verify ink, toner, and alignment, ensuring your printer is functioning properly and delivering quality output consistently.
2. Why Should I Print A Test Page From My Printer?
Printing a test page is essential for ensuring your printer is operating correctly. It helps check print head alignment, ink or toner distribution, and overall print quality. If there are streaks, missing colors, or alignment issues, the test page highlights the problem immediately. For new printer installations, a test page confirms that drivers are installed properly and that the printer is communicating with your computer. For older printers, it helps identify whether maintenance or cartridge replacement is needed. Regularly printing test pages prevents long-term damage, reduces wasted ink, and ensures the device delivers professional-quality prints at all times.
3. How Do I Print A Test Page On Windows 10 Or Windows 11?
On Windows 10 and Windows 11, printing a test page is quick. Go to “Settings,” select “Devices,” then “Printers & Scanners.” Click your printer, choose “Manage,” and then click “Print a Test Page.” Alternatively, you can open the Control Panel, go to “Devices and Printers,” right-click your printer, and select “Printer Properties” followed by “Print Test Page.” This will instantly print a page showing alignment, text, and color. The test confirms whether the printer is properly installed and communicating with the system, making it a reliable tool for troubleshooting driver or print quality issues quickly and effectively.
4. Can I Print A Test Page Without A Computer?
Yes, many printers allow you to print a test page without needing a computer. On models with onboard control panels or touchscreens, navigate to “Setup,” “Reports,” or “Tools,” and select “Print Test Page.” For printers without screens, holding specific button combinations, such as “Power” and “Resume” or “Cancel” and “Color Copy,” often triggers a diagnostic page. These direct methods are particularly helpful when troubleshooting hardware issues or verifying ink and toner levels without depending on a connected device. They allow you to confirm that your printer hardware is working properly, independent of computer drivers or software.
5. How Do I Print A Test Page On Mac Computers?
On a Mac, printing a test page is simple. Open the Apple Menu, go to “System Preferences,” then select “Printers & Scanners.” Choose your printer from the list, click “Options & Supplies,” and open the “Utility” tab. From there, select “Open Printer Utility” and then click “Print Test Page” or “Print Diagnostic Page,” depending on your printer model. This feature helps verify print alignment, ink distribution, and communication between your Mac and printer. Running this test ensures that both the software drivers and the printer hardware are functioning correctly, providing clean and professional print results every time.
6. How Do I Print A Test Page On Linux?
Linux users can print a test page through the Common UNIX Printing System (CUPS). Open your web browser and type “http://localhost:631” into the address bar. Click on “Printers,” select your device, then choose “Maintenance” and click “Print Test Page.” Many Linux desktop environments also allow you to print test pages through system settings under “Printers.” These test pages are essential for verifying proper driver installation, checking print head alignment, and ensuring high-quality output. Running them regularly helps prevent issues such as streaking or color misalignment, ensuring that your Linux system communicates correctly with your printer at all times.
7. What Does A Printer Test Page Show?
A printer test page typically displays alignment patterns, color blocks, grayscale gradients, and sample text. These elements reveal whether the ink or toner is evenly distributed, if the print head alignment is correct, and whether colors are printing consistently. Some test pages also include diagnostic information such as printer name, driver details, and connectivity status. By analyzing the test page, you can identify issues like clogged nozzles, low ink levels, or misconfigured drivers. This diagnostic tool is invaluable for troubleshooting both hardware and software issues, helping ensure that your printer consistently produces high-quality documents and images.
8. How Often Should I Print A Test Page?
It is recommended to print a test page at least once every two to four weeks, especially if you do not use your printer frequently. This prevents ink from drying out in inkjet printers and keeps toner evenly distributed in laser printers. Regular test pages also help you identify problems early, such as fading prints, streaks, or alignment errors. For offices with high print volumes, test pages can be run weekly to ensure consistent quality. Establishing a routine of printing test pages maintains your printer’s performance, prevents costly breakdowns, and ensures professional-quality results when you need them most.
9. How Do I Print A Test Page To Check Ink Levels?
Printing a test page is one of the easiest ways to check ink or toner levels. Most test pages display solid color blocks, gradients, or text patterns that reveal whether ink is running low. If certain colors appear faded, streaked, or missing, this indicates that cartridges may need to be replaced. Some printers also include ink level information directly on the test page, while others display it on the printer’s onboard menu. Running this test allows you to quickly identify low supplies, ensuring you replace cartridges before running out and preventing interruptions during important printing tasks.
10. Can A Test Page Fix Printer Problems?
While printing a test page itself does not fix problems, it helps identify them quickly. A test page highlights issues like streaking, fading, missing colors, or misalignment, allowing you to take corrective actions such as cleaning print heads, realigning cartridges, or replacing ink or toner. It also confirms whether printer drivers are properly installed and whether the device is communicating correctly with the computer. By revealing the source of the problem, a test page guides you toward the right troubleshooting steps, ultimately helping restore your printer to optimal performance and preventing further technical issues in the future.
11. How Do I Print A Test Page On An HP Printer?
For HP printers, printing a test page can be done either from the computer or directly on the device. On Windows, go to “Devices and Printers,” right-click your HP printer, and select “Print Test Page.” On Mac, use “Printers & Scanners” under System Preferences. Directly from the printer, press the “Cancel” and “Color Copy” buttons simultaneously, or navigate to the “Setup” or “Reports” menu on touchscreen models to select “Print Test Page.” The test page will show ink levels, alignment, and print quality, helping you maintain your HP printer in optimal working condition with clear diagnostic feedback.
12. How Do I Print A Test Page On A Canon Printer?
Canon printers allow you to print test pages either from the connected device or directly on the printer itself. On Windows or Mac, access the printer properties or utility settings and select “Print Test Page.” Many Canon printers with built-in displays let you navigate to “Maintenance” or “Device Settings,” where you can select “Print Nozzle Check Pattern” or “Print Test Page.” This page reveals whether ink cartridges are functioning correctly and whether print heads are clean and aligned. Running these tests regularly ensures that your Canon printer maintains professional-quality output and reduces the risk of clogs or faded prints.
13. How Do I Print A Test Page On An Epson Printer?
Epson printers include built-in maintenance features for printing test pages. On Windows or Mac, open the Epson printer utility software and select “Nozzle Check” or “Print Test Page.” Directly from the printer, use the onboard control panel to navigate to “Maintenance” or “Setup,” then select “Print Test Page.” The printed sheet typically includes patterns of black and colored lines that help detect clogs, alignment issues, or fading ink. Epson’s test page function is particularly important because its inkjet heads can clog if not used regularly, making test printing essential for preventing long-term performance issues.
14. How Do I Print A Test Page On A Brother Printer?
Brother printers allow test page printing from both the computer and directly on the printer. On Windows, open “Devices and Printers,” select your Brother device, and click “Print Test Page.” On Mac, go to “Printers & Scanners” under System Preferences and select “Print Test Page.” Many Brother printers also have control panels where you can navigate to “Ink Management,” “Maintenance,” or “Reports,” and select “Print Test Page.” This function helps check ink cartridge performance, alignment, and print head quality. Regularly printing test pages ensures your Brother printer continues delivering high-quality results without streaks or missing colors.
15. How Do I Print A Test Page On A Samsung Printer?
Samsung printers, particularly laser models, include built-in options for printing test pages. On Windows, you can go to “Devices and Printers” and select “Print Test Page” from the printer properties. On the printer itself, use the control panel to navigate to “Reports” or “Information,” and select “Print Configuration Page” or “Test Page.” This page displays diagnostic information, toner levels, and sample text, allowing you to confirm print quality. Regularly running a test page on a Samsung printer ensures proper toner distribution, prevents misalignment, and provides important data for troubleshooting driver or connectivity issues quickly and efficiently.
16. How Do I Print A Test Page On A Dell Printer?
Dell printers allow you to run a test page from the computer or printer menu. On Windows, go to “Devices and Printers,” right-click the Dell printer, and select “Print Test Page.” On the printer’s control panel, navigate to “Reports” or “Diagnostics” and select “Print Test Page” or “Configuration Page.” These pages help identify issues with toner, ink, alignment, or connectivity. Running a test page on Dell printers regularly keeps the device in good condition, verifies installation, and ensures the hardware and drivers are performing as expected, delivering professional-quality print results consistently for home or office tasks.
17. How Do I Print A Test Page On A Lexmark Printer?
Lexmark printers support test page printing through both computer software and onboard menus. On Windows or Mac, access printer properties or Lexmark utility software and select “Print Test Page.” Directly from the printer, use the menu system to go to “Reports,” “Maintenance,” or “Device Settings,” where you can choose “Print Test Page” or “Print Quality Page.” These test pages reveal alignment, toner performance, and diagnostic details. By running them regularly, you can identify potential issues early and maintain your Lexmark printer in optimal condition, preventing poor-quality prints and minimizing the risk of costly hardware or supply-related problems.
18. How Do I Print A Test Page On A Xerox Printer?
Xerox printers provide test page options in both software and onboard menus. On Windows, go to “Devices and Printers” and select “Print Test Page.” On the printer, use the touchscreen or menu buttons to navigate to “Reports,” “Information Pages,” or “Device Diagnostics,” then choose “Print Test Page” or “Print Quality Page.” The test sheet typically includes alignment blocks, sample text, and diagnostic information. This helps identify toner issues, print quality problems, or driver misconfigurations. Running test pages regularly ensures Xerox printers continue delivering sharp, professional-quality results and reduces the likelihood of unexpected technical problems during important printing tasks.
19. How Do I Print A Test Page On A Ricoh Printer?
Ricoh printers allow users to run test pages from the computer or printer menu. On Windows, open “Devices and Printers,” select your Ricoh device, and click “Print Test Page.” On the printer, navigate to “Reports” or “Printer Maintenance,” and select “Print Test Page” or “Print Configuration Page.” These pages show alignment, toner distribution, and diagnostic data. Ricoh test pages help users confirm whether the printer is functioning properly and whether toner cartridges need replacement. Regularly printing these pages is especially important in office environments where high print volumes require consistent quality and reliability.
20. How Do I Print A Test Page On A Kyocera Printer?
Kyocera printers feature options for test pages via both computer systems and onboard menus. On Windows, right-click your Kyocera printer in “Devices and Printers” and select “Print Test Page.” On the device itself, navigate through the menu to “Reports” or “Maintenance,” then select “Print Test Page” or “Print Quality Page.” These pages contain text, alignment blocks, and diagnostic patterns that reveal potential toner or driver problems. Running them ensures the Kyocera printer remains in optimal condition, providing high-quality results for both black-and-white and color documents, while minimizing technical interruptions during important printing operations.
FURTHER READING
- How To Fix A Printer Printing Too Dark | Troubleshooting And Easy Solutions For Printer Quality Issues
- What Is A Printer Test Page? | Definition, Purpose, Benefits, And Troubleshooting Guide To Printer Test Pages
- Why Is My Printer Printing Extra Blank Pages? | Causes, Fixes, And Troubleshooting Guide
- How To Connect A USB Printer To Wi-Fi | Simple Setup Guide For Wireless Printing
- Why Is My Printer Not Printing From My Phone? | Common Mobile Printing Problems And Fixes For Wireless Printers
- How To Fix Printer Ghosting Problems | Causes, Solutions, And Maintenance Tips For Clear Print Quality
- Can I Print Directly From My Camera To A Printer? | Direct Photo Printing Guide For Cameras And Printers
- What Is The Best Printer For Small Business? | Top Office Printers, Features, And Buying Guide
- How To Add A Wireless Printer To Your Computer | Easy Setup, Step-By-Step Guide For Windows And Mac
- What Is The Difference Between Printer Ink And Toner? | Printer Ink Vs Toner Explained For Better Printing Results